The Flip Flop Popper
Cheap footwear into super fish catcher
By David Hutton
May 28, 2018
May 28, 2018
Poppers!
Just the word makes most fly anglers sit up and take notice.
Some get antsy just thinking about poppers.
Since E.J. Peckinpaugh and Will Dilg marketed the first commercial cork poppers in the 1920's, fly men and women have been using the venerable popper to catch fish.
Bass were the original targets of the popper, but today most any fish you can name has been taken on them, both in salt and fresh water.
But we have come to think of them mostly as warm water flies for bass and, increasingly, bluegill.
Today, few other fish are associated with the "popper" as much as these two.
Materials
Many materials have been used for poppers, with one obvious requirement: it must float.
The first poppers were made in the Ozarks in the late 1800's, from beer bottle corks and turkey feathers. Since then, cork has been the traditional go-to. Its a little heavy, but it is rugged.
Balsa wood came into the mix in the 20th century prior to WWII. Its light, but can be a tad fragile.
But these minor flaws aside, millions of poppers have been made from cork and balsa, alone.
But people like to experiment and try new things.
For instance, Louisiana innovator, artisan, and author, Kirk Dietrich, turns popper bodies on a small lathe using paulownia wood - a very light, fine-grained, and warp-resistant hardwood. The works of art he creates this way are testimony to this materials' ability to take a finish.
But increasingly, expanded plastic foams have been used to the point where I'd say they now dominate the popper field.
First was Styrofoam, the trade name for air-injected polystyrene - the same stuff cheap ice chests are made from.
It is buoyant, can be molded in many shapes and is, well, cheap. But it can be crushed easily and will melt if kept in contact with soft plastic lures and baits.
The Solution
Enter "craft foam," the generic name for ethylene-vinyl acetate (EVA).
The stuff is produced in a rainbow of colors and comes in everything from sheets, to rods, to blocks.
It is tough as nails, can be easily shaped, and is practically impervious to anything you or the environment can throw at it.
For the man or woman who ties popper flies, it overcomes the limitations of Styrofoam, cork or balsa.
And among the many things it is made into (besides flies) is possibly the least likely of fly tying materials - the cheap beach and pool sandal.
And among the many things it is made into (besides flies) is possibly the least likely of fly tying materials - the cheap beach and pool sandal.
Also known as, “Flip-Flops.”
These can be found in almost every dollar, drug, and discount store in the country. They usually cost anywhere from 89 cents, to a few dollars for the fancy ones.
I often find them floating along the shore, the mystery of their loss hanging over them.
But whether you buy them or find them, how do you make a cheap flip flop into a fish catching popper fly?
I first learned of this technique from fellow float tuber, Big Bluegill member, and Oklahoma man, Greg McBill. I'm adding a link to his input on the topic....
Greg McBill on The Flip Flop Popper
How I Do It
I normally make my poppers for use on bass and bluegill, so I'm not making gigantic ones.
I use either a sharpened piece of thin-wall, 3/8" stainless tubing, or a spent .357 Magnum cartridge casing. Pretty much the same thing.
The idea behind this two-fish role is called, “The Bass Bluegill Lap,” and it started with the late, great Jack Ellis.
I often find them floating along the shore, the mystery of their loss hanging over them.
Cheap Flip Flops
But whether you buy them or find them, how do you make a cheap flip flop into a fish catching popper fly?
I first learned of this technique from fellow float tuber, Big Bluegill member, and Oklahoma man, Greg McBill. I'm adding a link to his input on the topic....
Greg McBill on The Flip Flop Popper
How I Do It
I normally make my poppers for use on bass and bluegill, so I'm not making gigantic ones.
I use either a sharpened piece of thin-wall, 3/8" stainless tubing, or a spent .357 Magnum cartridge casing. Pretty much the same thing.
The idea behind this two-fish role is called, “The Bass Bluegill Lap,” and it started with the late, great Jack Ellis.
Guide and author Skip Morris has an excellent 2-part article on it here...
Bass Bluegill Lap
The cutter I've just described is forced down into the foam sole of the flip flop and turned gently as it goes in. I also chuck the cutter in a drill and spin it for a cleaner cut. Either way, you end up with a pretty neat cylinder of the foam.
Once the body cylinder is cut out, I sometimes lop off a piece of the rear at a 45° angle, to give the body a taper.
You can also spin the body on a mandrill in a Dremel tool, and shape it with a sanding stick.
But, more and more, I forego the shaping and use the cylinder straight from the punch - the fish don't care, so shaping is just extra work.
Once the body is formed, I use a sharp single-edge razor blade to cut a slit in the bottom to accept the hook.
The hook I normally use for my poppers is a #4-#6 Carlisle (aka, "cricket hook").
I bend a hump kink into the hook shaft with round-nose pliers, which prevents the body from turning around the hook shaft. Then, I wrap fly-tying thread around the shaft where the body will go. Finally, I position the foam body on the kinked shaft, hold it closed with a clothespin, and apply super glue to the joint.
In a few seconds, it’s secure and solid.
The Forgiving Hook
I also apply some round nose pliers to open the hook gap a little, and bend the protruding hook at a slight downward angle.
These hooks are classed as "light wire," which is adequate for bass and panfish with fly tackle. But, because they are heat-treated wire and not forged steel, they give you this ability to modify their shape.
Here are two more good reasons to use these light wire hooks:
1. They pierce a fish's jaw easily.
2. They can be pulled free from snags
If kept sharp, these hooks nearly set themselves.
But sometimes they snag on wood and other obstructions. When that happens, just apply steady tension on the line and pull straight towards you.
If you tie a good knot, and your tippet can take the strain, the hook will begin to straighten... and voila! It normally pulls free from the snag.
Then, use your forceps or pliers to bend it back into shape and you're back in the game. Easy-peasey.
The Finishing Touches
Once cemented on the hook, the foam body is decorated with dots, stripes - and eyes. I use plain old nail polish for this work.
You can decorate to your hearts content, as this is the "artistic" phase - again, the fish don't care, but you probably do.
Me, I keep it simple. But, do what you want.
Once you've decorated the body as you like it, a coat of clear nail polish finishes it off. That's it.
Say No To Epoxy
How about an epoxy finish?
It seems that nowadays, people simply must add epoxy to everything... and poppers are no exception. These folks chomp at the bit to mix up a batch of epoxy, or to whip out the ultraviolet flashlight for a UV coat.
But I don't find it necessary with these EVA poppers.
The foam is bullet-proof, on its own, and it isn't harmed by smacking it into wood or rocks. So, it doesn't need a hard, epoxy shell for protection.
It won't soak up water like natural materials, and it makes little difference to the function if it is not glossy.
The foam is bullet-proof, on its own, and it isn't harmed by smacking it into wood or rocks. So, it doesn't need a hard, epoxy shell for protection.
It won't soak up water like natural materials, and it makes little difference to the function if it is not glossy.
And besides, if an epoxy finish coat isn't there, well, you can't chip, ding, or knock pieces of it off.
There is also a weight factor with epoxy, although that's probably negligible. But above all, its just easier to not fool with it.
With all that said, if you have epoxy withdrawals unless you smear some on, then use it.
There is also a weight factor with epoxy, although that's probably negligible. But above all, its just easier to not fool with it.
With all that said, if you have epoxy withdrawals unless you smear some on, then use it.
But you don't need to.
The Dressing
The tail dressing is the last step, and can be anything you want. Deer hair, squirrel hair, calf tail, rabbit or fox, bucktail...all these and more can be applied.
For feather dressings, marabou is an option, and the standard embellishment is 2 or 4 cheap, Chinese cock neck or saddle hackle feathers.
I've used them all, and I keep it simple....
1. Add a sparse tuft of deer hair behind the body, first. Tie this to the hook shank so it flares just past the bend; make it about a hook gap in width. In the next step, I'm adding hackle feather "legs" - and the deer hair helps hold them apart.
2. Tie in 2 or 4 proper sized hackle feathers. These should be about hook shank in length. Tie them in on each SIDE of the hook, so the deer hair splays them apart.
3. Complete the dressing by wrapping another hackle in the gap between tail and body.
How about rubber legs? Many folks just gotta have rubber legs on their poppers, and the fish don't seem to mind. Not that its required, mind you; long before rubber hackle came on the scene, people were catching fish without it.
But if you want to add legs, it is easy.

Just push an embroidery needle threaded double with mono through the foam body, and pull it out to form a loop on the opposite side. Load the loop with the rubber legs and then pull them through.
See the illustration above.
I like both round rubber hackle, or the silicone strands used to make spinnerbait skirts for bass. A tiny dot of super glue where the legs exit the body secures them.
A Few Pictures

Pond bluegill on a black Flip Flop Popper


Thanks so much for reading, and...
Tight Lines,
Dave Hutton
© All rights reserved, David Hutton/Palmetto Fly N Fish 2018/2025

Pond bluegill on a black Flip Flop Popper

Flip Flop Popper Chomp!

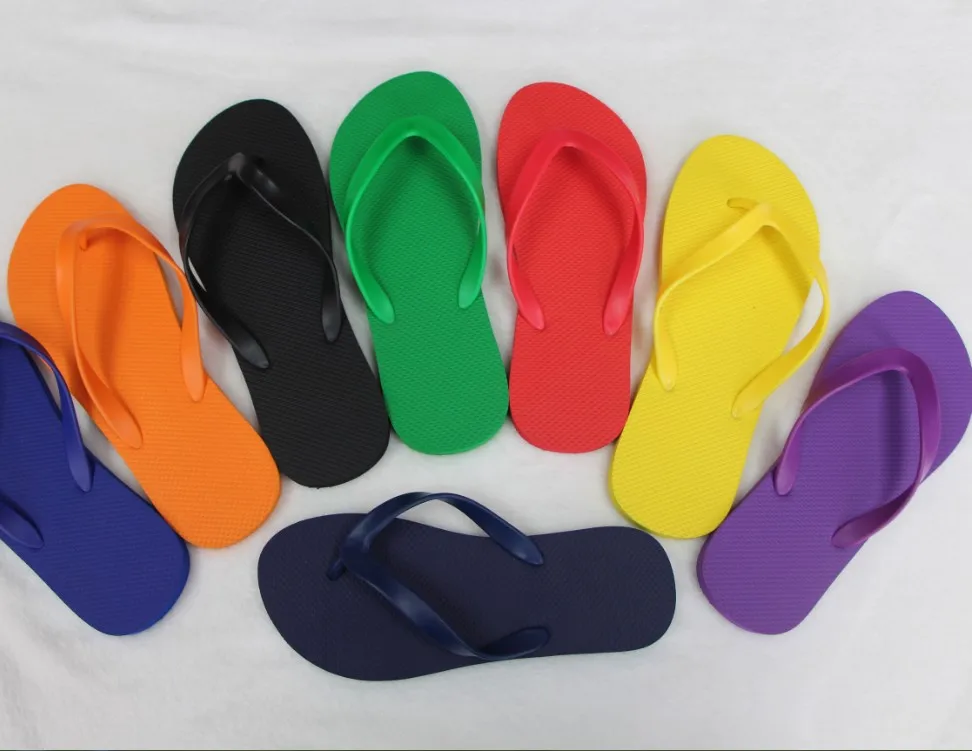
Assortment of Flip Flop Poppers
The six from the top, down, are variations in decorating and size. The third one down is the black popper from the preceding fotos. It is still in my fly box, and has caught its share of bass and bluegill along the way....and is little worse for wear, today!
PS the last two are poppers made from small cork indicator floats. Not the same, but still very nice
So, now you know. Try some Flip Flop Poppers yourself and see what you think!
So, now you know. Try some Flip Flop Poppers yourself and see what you think!
------------<~~>------------
Writers should strive for a job well done... even half-baked ones like me. So if you found value in this article, please like, comment, and share it.
Do you want to add the catching flies seen here to your own fly or tackle box?
Do you have questions, compliments, or suggestions?
If so, email me at...dahutist@gmail.com
Thanks so much for reading, and...
Tight Lines,
Dave Hutton
No comments:
Post a Comment
Comments are moderated