By David Hutton
Palmetto Fly n Fish
Feb 4, 2023

At that point in time, Tony was well into his Golden Years. But unlike many elderly folks that want nothing to do with "newfangled" things, Tony embraced the modern, including the internet.
He saw the potential in this outlet and in 2015, when I invited him to join my fledgling Facebook group, "Palmetto Fly 'N Fish," he jumped in.
From there, he took me under his wing for a while. He was a good teacher and an engaging talker, and we corresponded and chatted on the phone frequently.
As a newbie, that kind of attention from an expert has a long lasting impact.
Tony was well known in fly fishing circles, as a kind and generous man. You may not know it, but Tony Spezio was kind of big deal in aviation circles, too - he designed a homebuilt aircraft, "The TuHoler," the original of which is still flying!
I knew of it from longtime pilot friend, and great fly tyer himself, Don Schmotzer.(1)
But, of interest to us, Tony also had a couple of flies to his credit.
One is known as the, "Chili Pepper," a variation on the ubiquitous Wooly Bugger.
A unique frog pattern, crafted from polyethylene foam, "The Froggie" has always been in the back of my mind - and it pretty much just stayed there, kind of forgotten.
A Missed Opportunity, Made Right
I never did tie, or fish, the Froggie, and after Tony's passing in 2020, I felt ashamed about that. Considering the kindness he showed me, I should have tied at least a few Froggies. Alas, I did not, and today I can only own up to that misstep. But, I was able to rectify that situation recently.
My opportunity came during a discussion with Harry Glacken, on Gerry Randolph's Facebook page, "Carving Soft Wood and Balsa Bugs and Poppers." (2)
If you are even slightly interested in that topic, I recommend you check out Gerry's group.
While searching for info on a different pattern under discussion in the group, I was reacquainted with 'The Froggie' in C. Boyd Pfeiffers book. "Tying Warm Water Flies." (3)

Highly recommended book
Here's what Mr. Pfeiffer had to say about The Froggie:
"There are lots of ways of working with foam to make frogs and other floating bugs. This is a sinple and effectve way of making frogs of all shapes and sizes.
Tony Spezio began developing this patern in 1993, and it became a classic soon after. This is just another easy way to turn closed cell bfoam into an effectve surface pattern. The basic idea is to tie a strip of the foam at the eye, then to pull it around the hook shank in the horizontal plane to make a flat, surface-riding bug.
Tony has found it to be great on smallmouth and largemouth bass, as well as large bluegill. He often fishes it as the surface fly in a popper-dropper arrangement. He ties it in this original light yellow foam, as well as white, green, grey, orange, red, and, black."
From that same book, here's a good look at The Froggie, as tied by Tony
Spezio himself....
tied by Tony Spezio
Today, when we mention foam for flies, we inevitably mean EVA foam (ethylene-vinyl acetate), aka, "craft foam."
But back in the 1990's, when Tony adapted this pattern, well,... I'm sure he meant something else.
From period pictures, it appears the original foam used was a fine-grain, closed-cell, PE foam (poly-ethylene)... one might think of it as "packing foam" in 2023. Here is an example....

The Funky Froggie - First Attempt
When I first tried The Froggie, however, I just used a funky piece of "sponge rubber" foam from my junk stash - an open-cell, polyurethane type.

Funky foam
This stuff was quite literally, junk. It helped me get the tying process figured out, but it was old, crumbly, and it absorbed water quickly... the fly sinks after only half a dozen dunkings!
In retrospect, this might actually be useful. These, "Funky Froggies" (as I now call them) might be great as near-surface, swimming frog imitations. But, it is not what we are after.
Therefore, after some testing, I've switched to EVA foam, sourced from flip-flop sandals.
Yes, I said flip-flops. The cheap, dollar store kind of flip-flops. If you have never considered flip-flops for making flies, have a look at this: The Flip-Flop Popper
The Flip-Flop Froggie - Second Attempt

- Hook: 3 or 4 X long hook, 4-14
Thread: Flat waxed nylon, 210 denier or stronger
Tails: hen neck or saddle hackle.
Body: Strip of foam, sized for the hook.
As you can see in the pics, the thickness of the foam is about half the hook gap.
The width of the strip should be about the same as the hook gap; the wider the foam strip, the wider will be the body.
Eyes: Small round head pins.
Colors: Any color you like
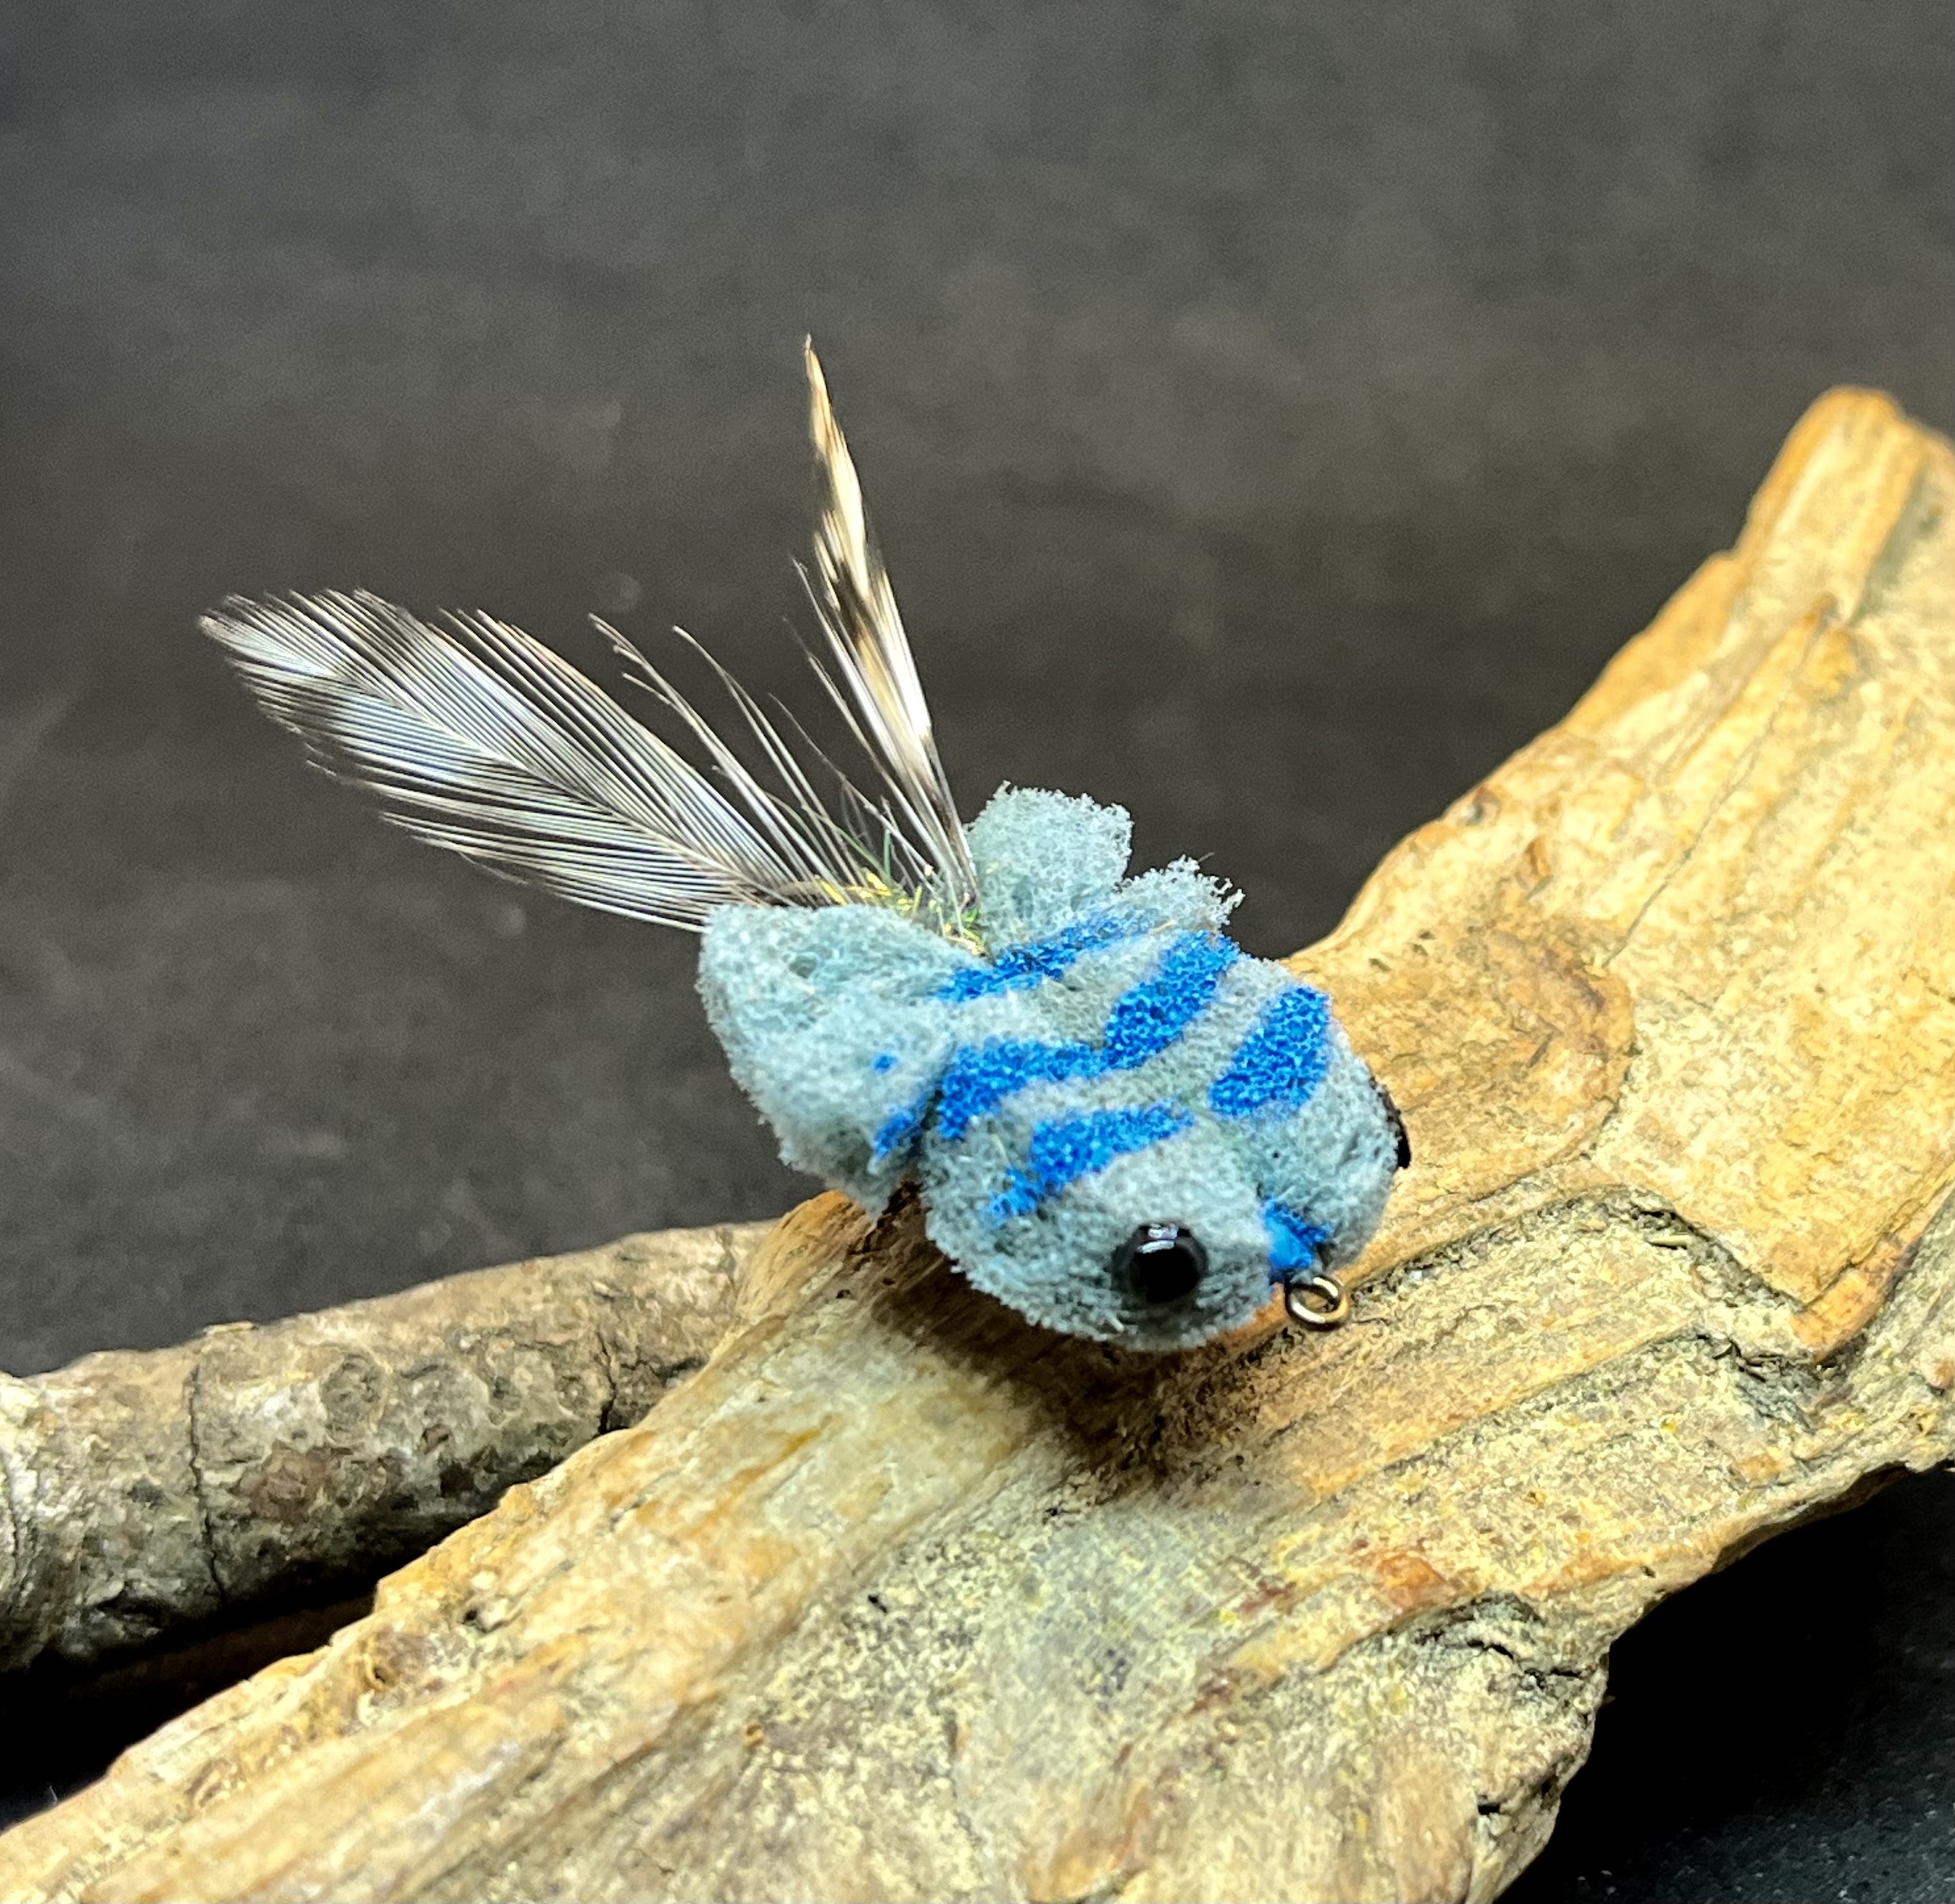
Colored foam is great for this; I have black, yellow, white, chartruese, orange, blue and more. For decoration, use textured fabric "puffy paint," nail polish, paint, or permanent markers
Dubbing material

There is nothing to keep the foam from misbehaving, as it is only tied in fore and aft. So give it a little jot of glue at these points.
2. Add a ball of dubbing between the hackle, "legs"
Adding a small ball of dubbing material at the hook bend helps ensure the feather "legs" will flare and give good action in the water.
3. Add a ball of material just forward of the legs, if needed.
Another small ball of material just in front of the first one helps the small false legs of the body to spread out. In theory, well-curved hackle feathers make this unneccesary. But, it may help. Dubbing works for this, as does a small tight knot of the same foam being used for the body.
4. Try textured fabric, 'puffy paint" for the eyes.
Tony used ball-head sewing pins to make eyes for his Froggie, and they look great!
But if you don't have any, try puffy paint by itself. It is easy to apply, and doesn't require an extra fabrication step.
4. Use a wide gap hook
You must keep the hook gap in mind when tying bodied flies; if the body obstructs the hook gap, you risk missing hookups. To take care of that problem, I applied round nose pliers to slightly open up a standard #4 Aberdeen hook.
THE FUNKY FROGGIE, First Attempt
THE "FLIP-FLOP FROGGIE"

A gaggle of 'Flip-Flop Froggies,' different color combinations

Flip-Flop Froggie - Up Close And Personal
Rest In Peace, Anthony "Tony" Spezio, 1930-2020
Would you like to add the catching pattern(s) seen here to your own fly or tackle box? Do you have questions, gripes, or suggestions?
If so, email me at...dahutist@gmail.com
Thanks so much for reading, and...
Tight Lines,
Dave Hutton
references
1. https://en.wikipedia.org/wiki/Spezio_Tuholer
2. https://www.facebook.com/groups/3077577939172710
4. https://www.flyanglersonline.com/flytying/fotw2/081604fotw.php
You may electronically copy, save, and print to hard-copy portions of this work for informational, non-commercial, private use only. You may cite portions of this work under fair use guidelines, as outlined in Section 107, Copyright Act
Any other use of the material is strictly prohibited without permission.
No comments:
Post a Comment
Comments are moderated