Welcome back!
In part 1 of, "Yusaku Crease Fly - Fly Tying Innovation," we introduced you to a pattern that is both unusual and attractive - the Yusaku Crease Fly...

This fly follows on the pattern pioneered by Joe Blados, the similarly named, "Crease Fly."
But it adds lifelike gills and a lively posture to set it apart.
In case you missed it, you can see part 1 at this link:
Yusaku Crease Fly, Part 1
Here in part 2, we will assume you are ready for the challenge of an advanced project like the Yusaku Crease Fly. With that in mind, let me show you how I've dressed the hook, assembled the fly's components, and touch on the finishing-off.
I'll include a few tips, and offer a couple of resources to assist you in making your own.
So lets get started!
So lets get started!
Get Those Bodies Moving!


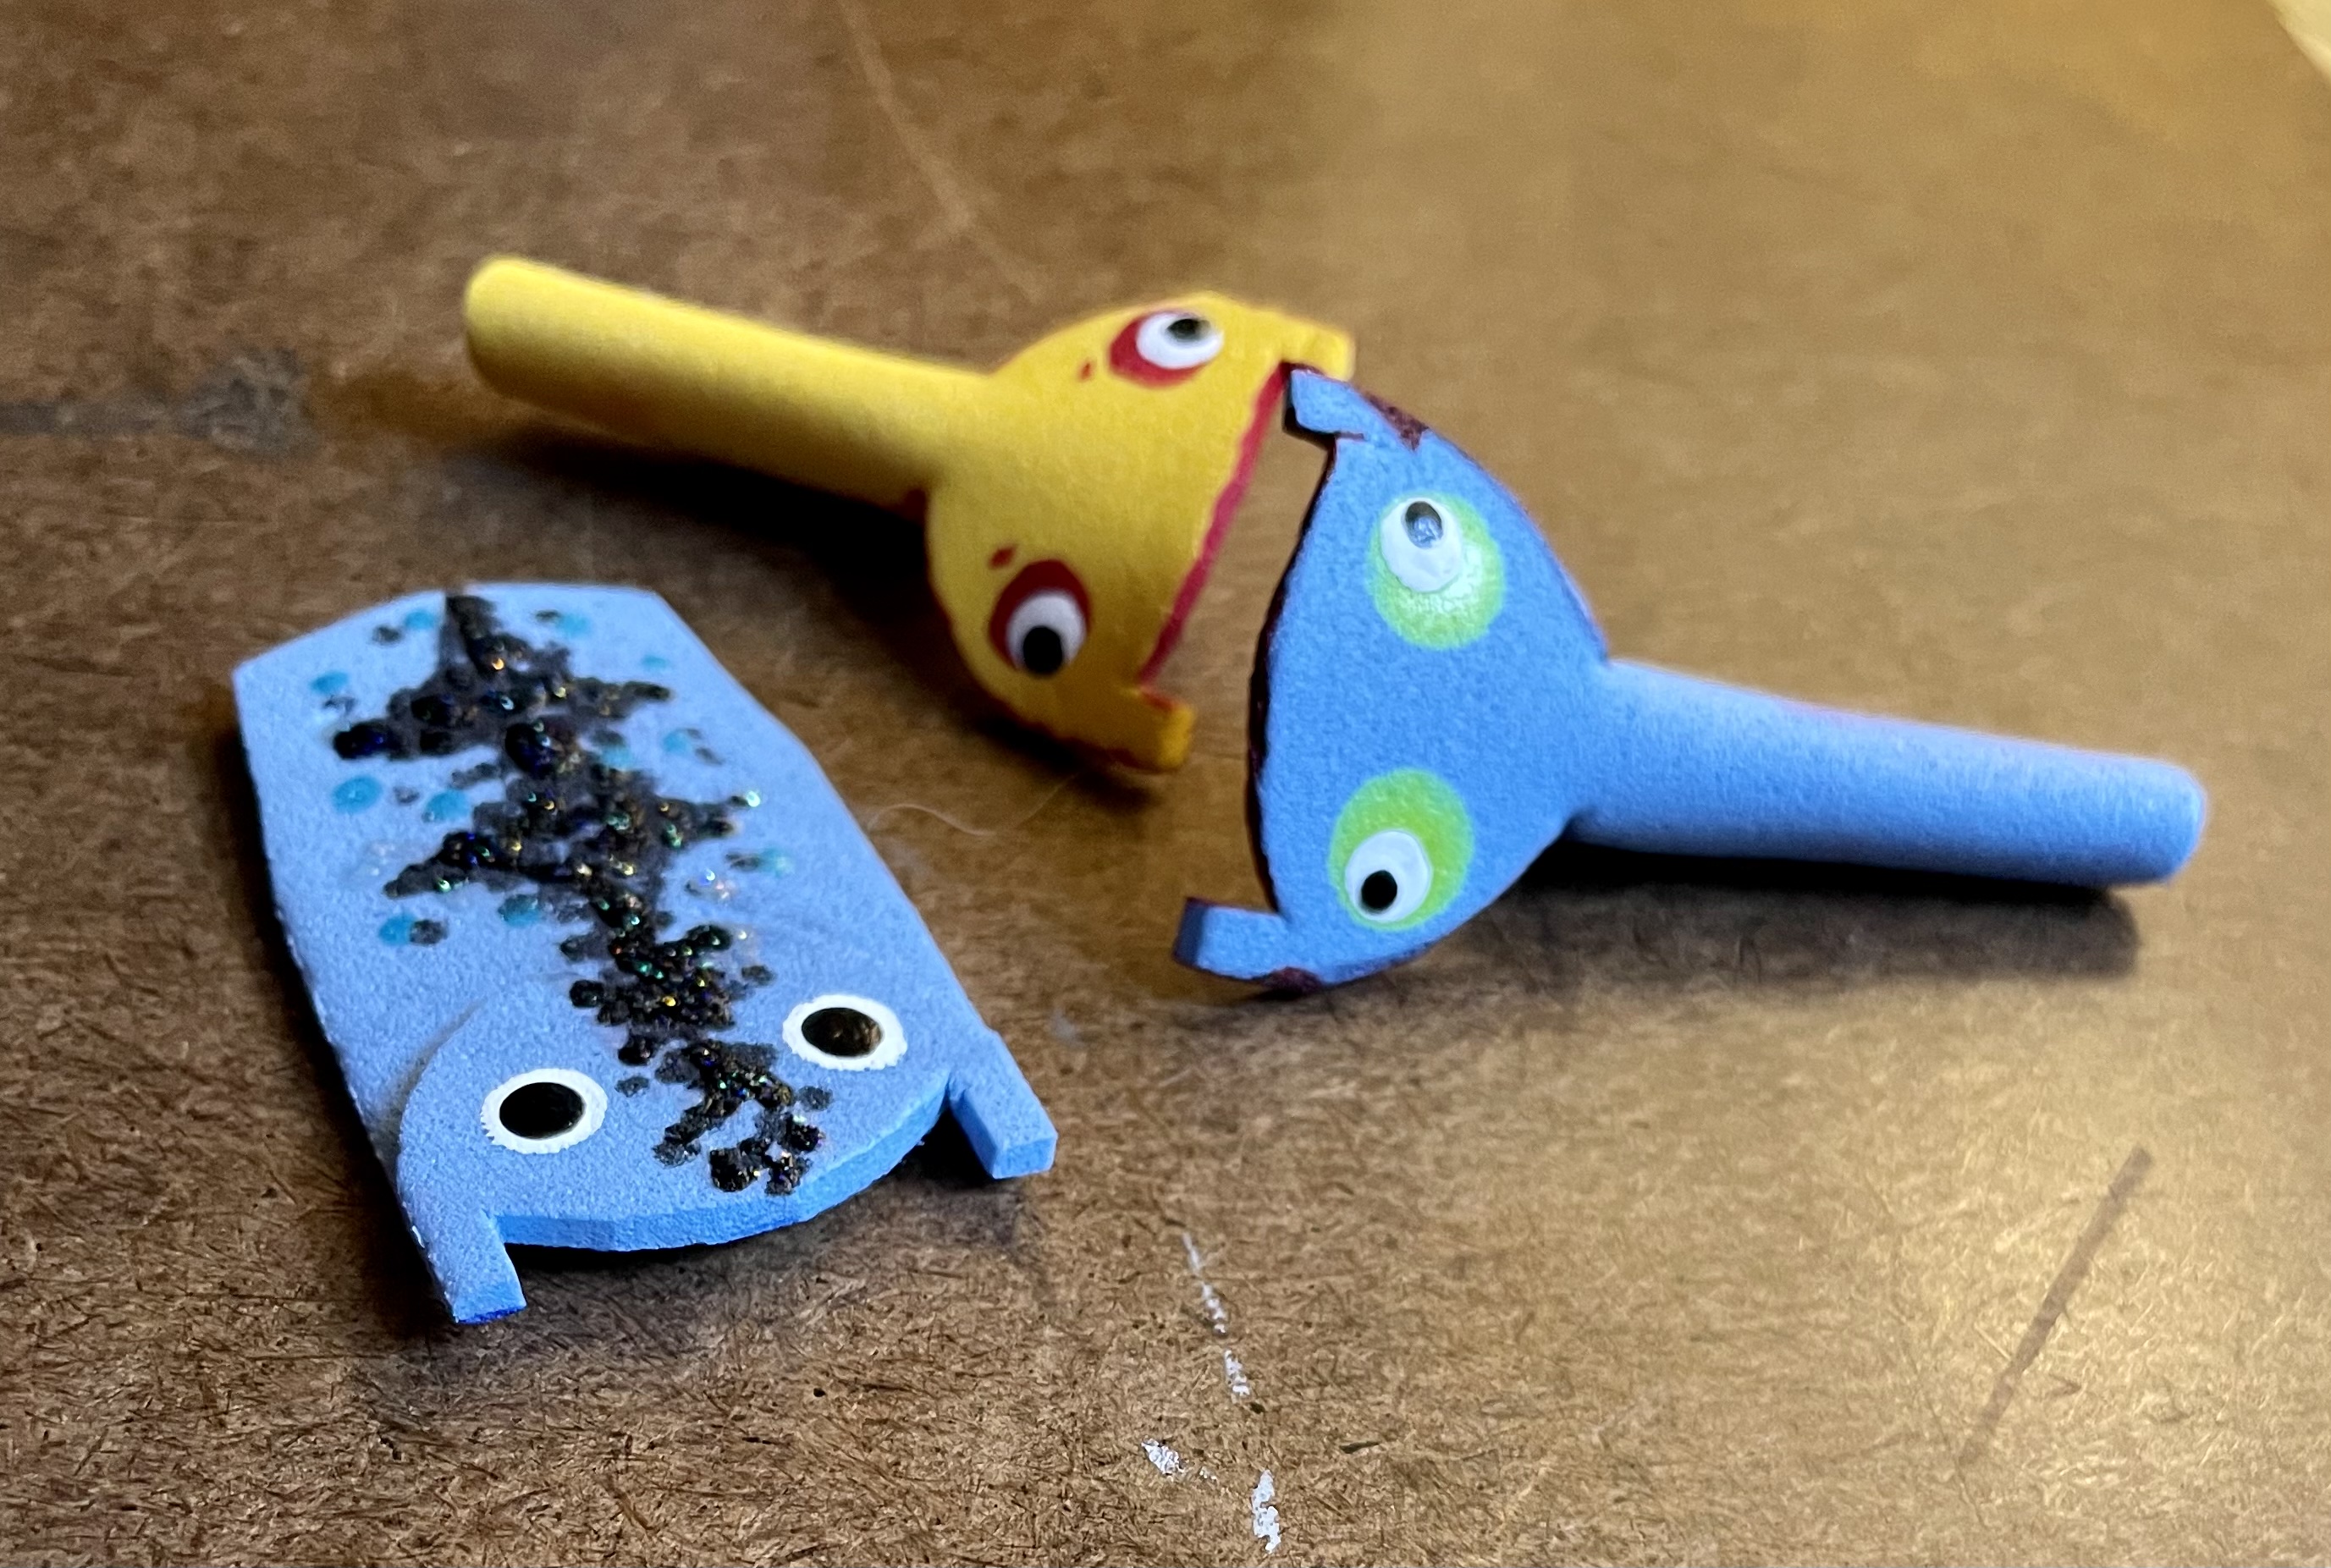
Here are some foam bodies in various stages of preparation. You can see them cut out from the foam, with decoration added, before their bodies are heat-fused into a tubular shape. To learn about the fusing process in more detail, it is described in part 1.
Also, notice the small tabs, or "ears," cut into the blank at the very front. Those will be the tie-down ears for the head, so don't forget to add them.
Also, notice the small tabs, or "ears," cut into the blank at the very front. Those will be the tie-down ears for the head, so don't forget to add them.
So with the bodies ready and standing by, its time to move to...
The Tail

The Tail

There are a couple of ways to go with the tail. One is more fiddly than the other, so I've chosen the easier method.
Really, this is just a version of the "feather pick" seen in the flower/floral trade.
For this, you tie tailing materials onto a body length section of toothpick.
You can use feathers, synthetic fibers, hair, or bucktail as I've done.
I've tried them all - I prefer bucktail.
Once the tail materials are tied around the toothpick, a little super glue ensures everything stays in place.
When you get the body formed, the tail pick is then inserted into the tail end and pushed in to the desired depth.
At that point, a drop or two of super glue is applied from the INSIDE to hold everything together.
Spacing Is Crucial
The body placement is key to the final look, so it must be tied to the hook shank at just the right place.
The head tabs ensure that the head is always right behind the eye, so that takes care of itself. But because you tie in the body FIRST, and work forward, you must sort out this positioning with some trial and error.
Depending on the look you want, the body position is adjusted like this:
- Move the body tie-in point forward: the body will have a straight appearance.
- Move the body tie-in rearward: tail lifts into the air, giving the fly a jaunty appearance.
To make sure you get the tie in point exactly where you want it, mark the hook shank when you get it where you want, until you get the feel of it.

Here the shank has been marked with a black Sharpie. The two marks indicate (from L to R), the tie-in point for the body at the mid-point, and the tie-in for the head, right behind the eye.

Here are the small tabs at the head, lining up with the marked tie-in point behind the eye.
Here is where you play with the body position. Grip the head tabs in their position, then move the body tie-point back and forth to get the look you want. Then mark that on the shank.
Note: the look you are after can be the difference of one millimeter, either way. So be precise.
Here is where you play with the body position. Grip the head tabs in their position, then move the body tie-point back and forth to get the look you want. Then mark that on the shank.
Note: the look you are after can be the difference of one millimeter, either way. So be precise.

I add a little red throat on these flies; it's a touch of something extra.
This throat, or beard, is made from red kiptail, aka, calf tail.
I'm showing my age at this point, because the term, "kiptail," is not used much today except by old-timers like me. So, if you hear it, just know they mean calf tail.
This throat, or beard, is made from red kiptail, aka, calf tail.
I'm showing my age at this point, because the term, "kiptail," is not used much today except by old-timers like me. So, if you hear it, just know they mean calf tail.
This early pic shows the beard back towards the body tie-in point.
But that put the beard in the way when tying on the body, so now I fix it right behind the eye - and tie the head ear tabs over it.
Very neat. Very tidy.
But that put the beard in the way when tying on the body, so now I fix it right behind the eye - and tie the head ear tabs over it.
Very neat. Very tidy.

The body is tied in this way. The pointed end of the rounded gill cutout serves as an anchor for tying in. You want to get it tied in right on top of the hook shank, so the hook orients on the belly centerline.

Once the body is attached, the head is then tied down using the ear tabs cut into the foam blank in the beginning. Here I show it after completion, as its a pretty straightforward job by this point.
A bit of red nail polish at the tie in blends it all together.
A bit of red nail polish at the tie in blends it all together.

The Finished Yusaku Crease Fly

A Shoal of Yusaku Crease Flies...
different techniques and materials shown
TIPS
- A jot of super glue at the the body tie-in adds some strength.
- It's best to decorate the foam body BEFORE starting construction.
- Remember: hook weight ballasts the fly to float upright.
- A jot of super glue at the the body tie-in adds some strength.
- It's best to decorate the foam body BEFORE starting construction.
- Remember: hook weight ballasts the fly to float upright.
- Decorate with nail polish, paint, permanent marker; all these are excellent.
- Think of the fly as a series of modular components... body, tail, dressed hook, etc.
- Think of the fly as a series of modular components... body, tail, dressed hook, etc.
MATERIALS
I discussed the materials in part one, but here's a brief recap:
Foam - craft foam, the basic component. Any color you like, usually 2mm
Tail - Feathers, synthetic fiber, bucktail, flash, etc.
Hook - heavy hooks are best, but if you are using light wire hooks, add wire wraps to help ballast the fly.
Super Glue - I recommend liquid, not gel. Its quick, tough, and easy to get. Any brand will do.
RESOURCES
There are precious few sources on the internet about this fly; its obscure, for sure.
This is pretty much the only resource for the original, Version 1
http://flytyingnation.com/yusaku-crease-fly/
Version 2 is an adaptation that has an underslung, articulated hook
There are precious few sources on the internet about this fly; its obscure, for sure.
This is pretty much the only resource for the original, Version 1
http://flytyingnation.com/yusaku-crease-fly/
Version 2 is an adaptation that has an underslung, articulated hook
http://flytyingnation.com/yusake-crease-2-0/
Many thanks to Mr. Dron Lee, who made this pattern come to life.
I hope you learned something from this. If you enjoyed it, a like and share is appreciated.
If you are interested in a no drama, Facebook fishing page, visit us at: Palmetto Fly n Fish
Tight Lines,
Many thanks to Mr. Dron Lee, who made this pattern come to life.
I hope you learned something from this. If you enjoyed it, a like and share is appreciated.
If you are interested in a no drama, Facebook fishing page, visit us at: Palmetto Fly n Fish
Tight Lines,
David
Palmetto Fly n Fish
©2022 all rights reserved
No comments:
Post a Comment
Comments are moderated